Compass Reading Learning Objectives
After completing this section you should be able to:
- Identify the cardinal direction points
- Identify the basic parts of a compass
- Identify and correct for magnetic declination
- Orient a map with a compass
- Take a bearing
- Determine location using triangulation
Identify the cardinal direction points
![550px-Compass_rose_browns_00.svg By seamus mcgill (mcgill) (Own work) [Public domain], via Wikimedia Commons](https://howtowilderness.com/wordpress/wp-content/uploads/2011/10/550px-Compass_rose_browns_00.svg_-300x300.png)
Since cardinal points are relative to each other, we only need to know one of them, then we can figure out all the rest. The fact that a free spinning magnetized needle will align with the local magnetic field of the earth, is good way for us to figure out the one we need (assuming you know how to correct for declination, covered later).
Identify the basic parts of a compass
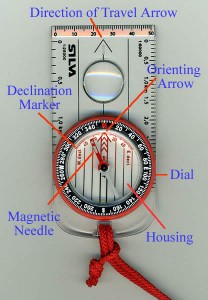
There are a variety of compass styles, but for wilderness navigation, a basic orienteering compass has all the features you need.
- Magnetic Needle: The floating magnetized piece of metal, which aligns with the local magnetic field. The red end points (generally speaking) in direction of magnetic north.
- Housing: Sealed transparent case that contains the magnetic needle
- Dial: Rotating ring containing degree markings and cardinal points (north, south, east, west)
- Orienting Arrow: Arrow used to orient compass. This is done by rotating the dial to align with the magnetic north end of the compass needle.
- Direction of Travel Arrow: Arrow used to calculate a bearing. Point arrow to target, orient compass, then read bearing in degrees at intersect point.
- Declination Markers: Adjustment to correct for differences between magnetic north and true north. This setting offsets the orienting arrow from the dial by the appropriate degrees. If your compass does not have this option, you will have to manually do the calculation in your head, adding or subtracting the correction.
Identify and correct for magnetic declination:
Why do I need to correct for Declination?
A magnetic compass will align its needle with the local magnetic field, which in most cases, is not the same as true north. One of the most important skills when using a magnetic compass is the ability to correct for this difference, known as declination.
The amount of declination varies by your location.
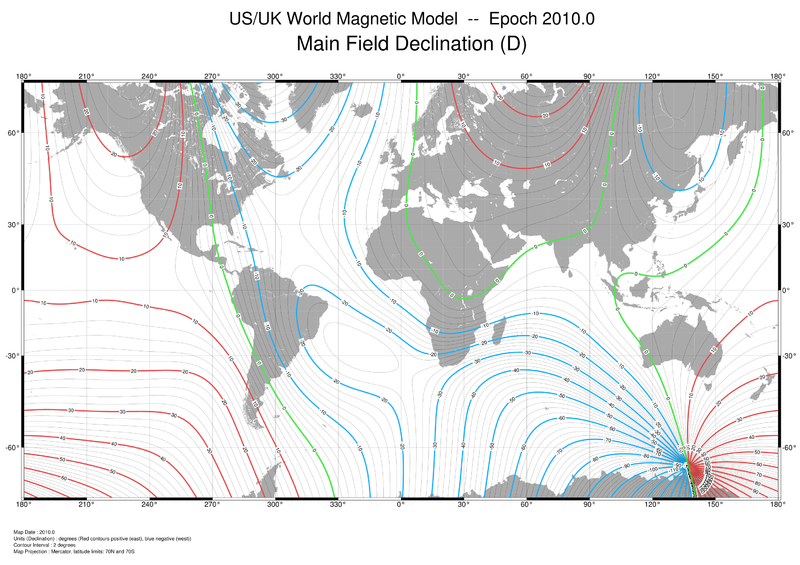
In the US/UK World Magnetic Model map , the green line represents the only location where the local magnetic field aligns with true north.
If you are lucky enough to be on one of the green lines, your declination is zero(0), meaning no correction is required. For the rest of us, however, we need to correct. Magnetic north is in the Canadian Arctic. So in the western US, a magnetic compass will point too far to the east. In the eastern US, a magnetic compass will point too far to the west.
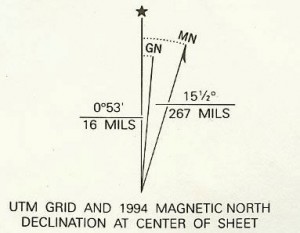
Declination values at a given location are usually printed on topographic maps.
San Fransisco has a current declination value of about 14 degrees east. New York City has a current declination of about 13 degrees west. Current? Is it changing? Well, unfortunately, yes. But not very quickly. So if your topographical map is is not too old, you are probably fine.
This is one of the reasons maps have a date printed on them.
The declination animation gives you an indication of how magnetic fields have changed over time.
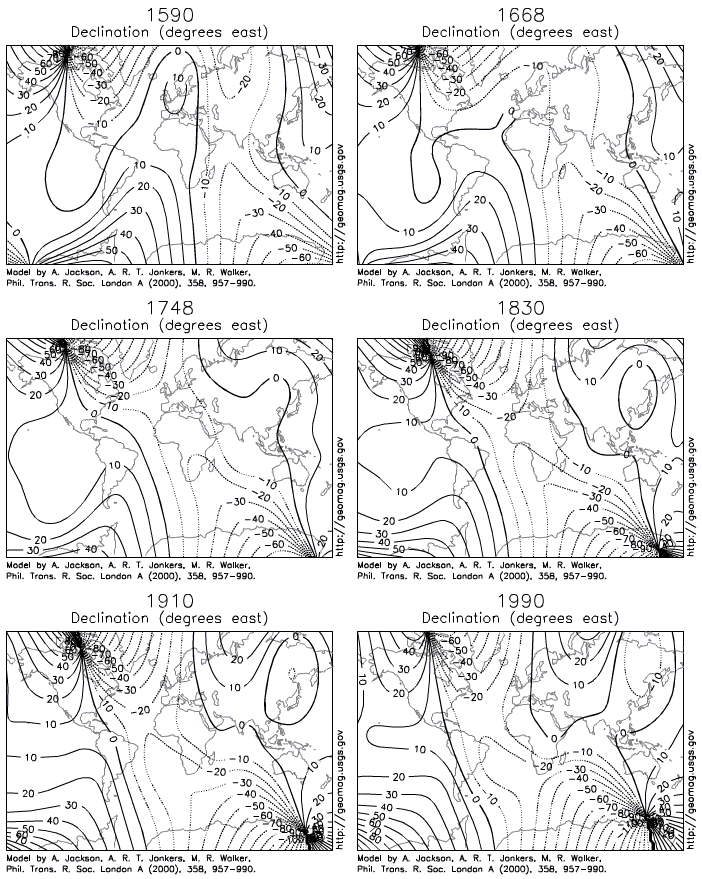
A map from the San Francisco Bay area from 1961 will show a declination of 17 degrees, yet in 2011 is only 14 degrees. Depending on how far you are traveling, being off by 3 degrees can be quite significant. Before you give up completely, remember all this really means is that you need current information to make the appropriate correction between your magnetic compass and true north.
A great resource to help you determine your declination is:
https://www.ngdc.noaa.gov/geomag-web/#declination
How do I correct for Declination?
You have two choices: a physical offset on the compass or manually doing the math.
Physical Offset
If your compass has a declination adjustment (it might be a screw or dial setting) you can look up your current declination and set your compass.
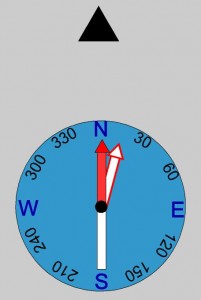
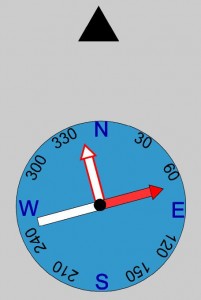
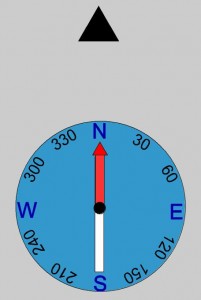
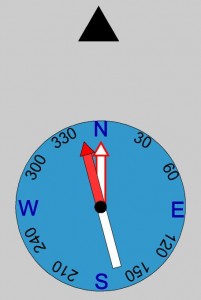
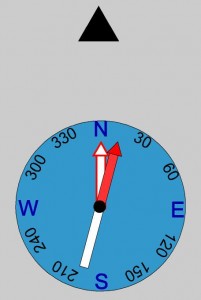
The declination setting simply offset the compass orienting arrow the appropriate number of degrees from the rest of the compass dial. In this first example, declination correction has been set for 15 degrees east. In other words, the orienting arrow points 15 degrees to the right of the cardinal point North.
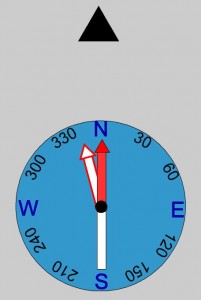
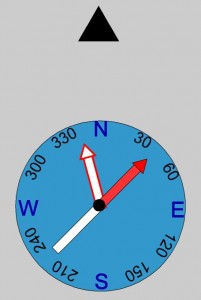
In this next example, the declination correction has been set for 15 degrees west. In other words, the orienting arrow points 15 degrees to the left of the cardinal point North.
Once you have the compass physically adjusted, every time you line up the needle with the orienting arrow, the actual degrees and cardinal points will have been corrected for your location.
Example:
In this example, the declination has been set to 15 degrees east (appropriate for say San Francisco). To orient the compass with the actual surroundings, so the cardinal points and degrees are pointing in the right direction, you rotate the compass until the magnetic needle aligns with the offset orienting arrow.
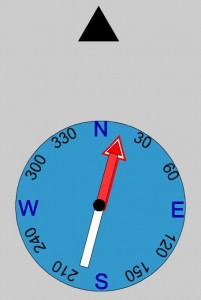
Once the compass has been rotated and the arrows aligned, the compass is now oriented. North is towards the “N”, east is towards the “E” and so on.
When using a compass which has been corrected for declination, you have to get used to the fact that the needle may look slightly off. Just remember it is aligning with the local magnetic field, and not pointing to true north.
Note: You must remember to reset your magnetic compass declination anytime you significantly change locations.Doing the Math
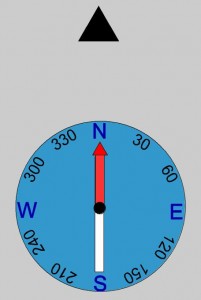
If your compass does not have a declination adjustment, the orienting arrow will always point to the “N” on your compass dial. In fact, the orienting arrow may even have “MN” written on it, indicating it is only for magnetic north. To make the appropriate corrections, you will need to manually add or subtract the declination value.
Although the magnetic needle appears to be pointing north, it is actually off by the declination value. Using the examples from before, if you are in a region with a 15 degree west declination (say somewhere on East Coast of US) the needle is actually pointing 15 degrees further west than true north. To correct, you need to move back 15 degrees towards the east. To find true north, you need to add 15 degrees. Since north is zero(0) degrees, true north would be what appears on this compass as 15 degrees (half way between 0 and 30 degrees).
If however, you are in a region with a 15 degree east declination (say somewhere on the West coast of US) the needle is actually pointing 15 degrees further east than true north. To correct, you need to move 15 degrees toward the west. To find true north, you need to subtract 15 degrees. Since a compass represents 360 degrees, north can be though of as zero(0) or 360. By subtracting 15 degrees from 360 degrees, you find that true north would be what appears on this compass as 345 degrees (half way between 360 and 330).
Take a Bearing
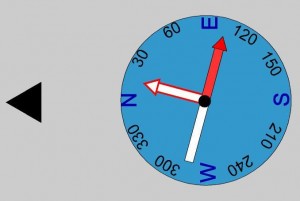
A bearing is the angle of direction to a target, usually in degrees. To take a bearing, you point the arrow of direction towards the target, and then orient the compass by aligning the orienting arrow with the compass needle. The bearing angle can then be read off the compass along the direction of travel.
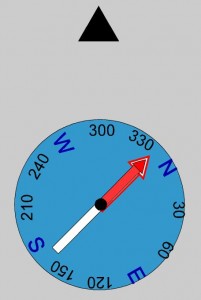
For example, in a region where the declination is 15 degrees west, the direction of travel is pointed at the target. Orient the compass, by turning the dial until the orienting arrow aligns with the compass needle. Once aligned, you can read the bearing degrees aligned with the direction of travel, which in this case is 300 degrees.
If you are using a compass which does not have a declination correction, you will need to manually add or subtract the declination value, as we saw before.
Orient a Map
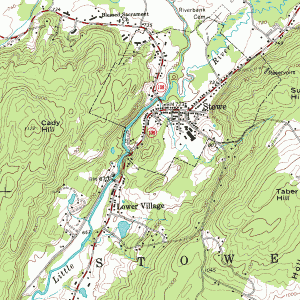
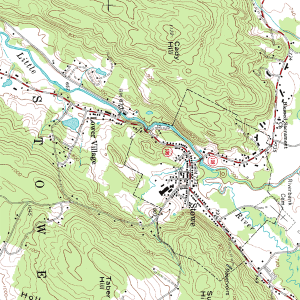
Orienting a map is the process to correctly align it relative to the local surrounds. In other words, an oriented may will have the top part of the map pointing true north, and the right side pointing east.
To orient a map using a compass, first turn the compass dial so north is aligned with the direction of travel. Ignoring for now the direction of the magnetic needle, place the compass on the surface of the map so the direction of travel is pointing to the top of the map. In other words, the “N” indicator on the compass is aligned with the North indicator of the map.
Holding both the map and compass together, slower pivot your entire body until the compass needle and the orienting arrow are aligned.
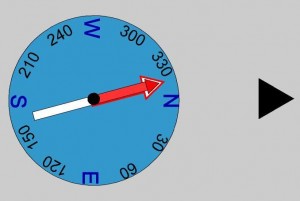
If successful, the compass needle should now be aligned with the orienting arrow, and the N on the compass dial should still be aligned with the North on the map. When all these conditions are met, the map is correctly oriented. Remember, if your compass does not correct for declination, you will need to manually do so. Some people do this by aligning the compass not with true north, but rather with the magnetic north indicator on the map.
Triangulate Location
Triangulation: Process to identify a location on a map by plotting overlapping bearings. The bearings may be from multiple locations to a single location, such as park rangers in towers calculating the location of a visible fire, or they may be from a single location to multiple landmarks, such as rescuer figuring out her current location from multiple known mountain peaks.
Compass Reading Review
After completing this section you should be able to:
- Identify the cardinal direction points
- Identify the basic parts of a compass
- Identify and correct for magnetic declination
- Orient a map with a compass
- Take a bearing
- Determine location using triangulation

