Category Archives: Safety

Safety is all about prevention – not the prevention of fun, but the prevention of pain and injury which typically conflicts with fun. Articles in this category are focused on prevention and planning.

How To Survive Hugging A Tree

A Tree to HugWhen most of us hear the term tree hugger, we think of an environmentalists.  Whether we hear the term as derogative or  effective is not the point.  The point is that the tree hugger is trying to save the tree.

There is another tree hugging movement whose objective is not to save the tree, but to save the tree hugger.   The focus of this movement is not big huggers, but little huggers, between the age of 7 and 11.

In Feb of 1981, 9 year old Jimmy Beveridge and his two brothers hiked a popular nature trail on Palomar Mountain.  Merely a half mile from where their parents were preparing lunch,  Jimmy became separated.  The brothers, assuming Jimmy was racing them back to camp, quickly returned.  Jimmy did not.   After 4 days of intensive search and rescue (SAR) efforts, Jimmy’s body was discovered 2 miles from camp.  He had died from hypothermia.

Tragedy and grieve are sometimes catalysts for noble plans of action.  Ab Taylor, who participated in Jimmy’s search, was determined to do something to prevent similar tragedies.  Working with a team, he created the Hug-a-Tree and Survive program targeted at very basic survival skills.  In 2005 Ab donated the rights to the program to the National Association for Search and Rescue.

The principle of the program is simple:  A lost child who stays put is easier to  find than one who keeps moving.  Initial searches typically focus where the child was last seen.  If the child keeps moving, that information becomes less and less helpful.  Once an area is searched, resources focus on other locations.  A moving child may enter a previously searched area, making the search and rescue more difficult.

Targeted for young children, the Hug A Tree program is designed to be delivered in about 30 minutes.   It typically covers these main points:

  • Hug A Tree:  When you are lost stay put.  Find a tree and hang on to it.  Since the tree won’t move, neither will you.  A tree is alive, just like your pet.  You can  name your tree and talk to it.  It will help protect you.
  • Always Carry a trash bag and whistle:  A trash bag is easy to carry in your pocket and easy to make into a jacket.  It will provide you protection from water and cold.  A whistle is easy to carry and can be heard from a longer distance than yelling.
  • Your family will not be angry with you:   Anyone can get lost.  Do not feel embarrassed or ashamed.  Do not hide from your rescuers.  Get comfortable and remain calm, knowing help is on the way.  Your family loves you and will be very happy to see you.
  • Make yourself big: Make it easier for others to find you.  Wear bright colors.  Blow your whistle.  Make a big X in the ground with sticks or rocks.
  • Animals are afraid of humans: If you hear a noise blow your whistle or yell.   If it is an animal, it will run away.  If it is a rescuer, you will be found.
  • You have hundreds of friends looking for you: If you hear people yelling your name they are not angry.  They are trying to find you.  Yell back, or blow your whistle.

Parents also play a key role.  The messages for parents include:

  • Prevention is key.  Make sure your child understands the main points of the program.  Help arrange a presentation at your school, church, or youth organization.
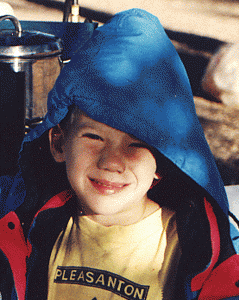
  • Young BackpackerFootprint your child.  A small piece of aluminum foil can be used to create a imprint of your child’s shoe.  Place the foil on a towel and have your child step on it.  It can be an extremely valuable tool for searchers.
  • Call for help right away.  If the child is moving, the search area will be expanding exponentially.  The sooner the search starts, the more quickly the child will be found.
  • Be available for interviewing.  Searchers rely on clues to find lost children.  You are the best source for clues.  Be available to provide them.

There is nothing scarier to a parent than the loss of a child.  A few minor steps can significantly increase the odds of a happy reunion.  If your child remembers to hug a tree, you may very well get another chance to hug your child.

How To Decrease Risks In The Wilderness

In terms of wilderness safety, there is only so much you can do.  And yet, there really is so much you can do.  If doing so for yourself is not motivating enough, then do it for someone else.  Do it for a loved one waiting at home, or a traveling companion depending on you, or a total stranger, such as the Search And Rescue volunteer who may be called into harms way.

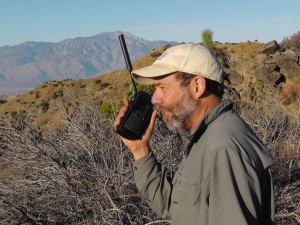
Satelite PhoneAs a commercial guide I have an obligation to do all I can to ensure the safety of my traveling companions.  I have to be Wilderness First Responder certified, CRP certified, and even Food Handler certified.  I carry an expedition sized emergency kit and usually a satellite phone.  I am an Eagle Scout, and “Be Prepared” seems fairly apropos.

This summer I helped guide a two week trip into the backcounty of Yosemite.  On the trip, one of my companions was carrying and reading Eric Blehm’s The Last Season, the tale of Randy Morgenson.  If you are not familiar with the story, Randy was a Backcountry Ranger with 27 years of experience in Yosemite, Sequoia, and Kings Canyon.  He was an expert in Search and Rescue (SAR) operations, yet ironically disappeared, causing one of the largest SAR efforts in Sequoia and Kings Canyon history.  It was 5 years before his remains were finally discovered in a remote part of the park.  Circumstantial evidence suggests he may have fallen through a snow bridge and died of hypothermia.

Randy was 51 years old, the same age I am.  Sometimes it is the little connections that make things real.

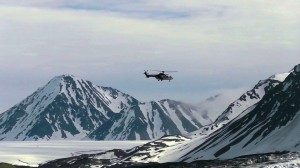
Helicopter RescueI recently joined a LinkedIn™ group called Pack6 Science Drop for Hikers and BackpackersPack6 was founded by Honor (Kori) Boone to honor her brother Michael Ficery.  When I Googled Michael Ficery the first link presented was for a website called Instant People Finder.  Oh, if only it were so easy.  Further down the list reality sets in.  On June 21, 2005 Michael Ficery, who was backpacking in the Yosemite backcountry, was reported missing.  A massive SAR operation was launched, reported as the most expensive in Yosemite history ($452,000).  Michael’s backpack, map, and camera were found near Tiltill Mountain.  Nothing else was ever found.  John Dill, probably the most famous and experienced Yosemite SAR, was quoted by the San Francisco Chronicle as saying of the case:

“It drives us nuts, of course,” Dill said. “Our goal is to find them, first because we want to save them, second for the benefit of their families and third for our own egos.”

Like Randy Morgenson, Michael Ficery was 51 years old.

The stories of Randy and Michael bring home the sobering reality that wildernesses are wild and things can happens.  Bad things.  It is also this wilderness wildness, however, that attracts us.  So what can we do to maintain the thrill of being in the outdoors, and yet at least partially decrease the risk?

Emergency Essentials

The mission of Kori Boone’s PACK6 is to educate the public while offering compact, pre-assembled kits of essential tools for hikers.  It’s more than a business opportunity.  It’s personal.

Certainly carrying emergency essentials, whether the PACK6 six items, the Boy Scout 10 Essentials, or your own experience-based outdoor essentials kit, provides two major advantages.  The first is the actual utility of the items themselves, but perhaps as important is the conscious reminder that being prepared matters.

Appropriate items banging around in your pack, however, means nothing if you do not know how and when to use them.  HowTo training is critical.  Also, as you can imagine, a kit of safety items is only one part of a plan to reduce risk.

Although not a comprehensive list, as you purchase or pack your emergency kit, consider these additional recommendations:

  • Plan your trip appropriate for the skill level of the participants
  • Plan for likely risks including health, weather,  swift water or avalanches
  • Ensure reliable and safe water sources
  • Plan bailout routes for each campsite
  • Share your itinerary, including dates of expected entry and exit
  • Ensure each participant is carrying their own personal essentials, including food and water
  • Agree on an action plan in the event of separation
  • Carry appropriate communication devices (2-way radios, cell phones, beacons, satellite phone)
  • Carry emergency contacts and medical treatment / insurance information

It would be naive to think that simply following these and similar precautions would have prevented the tragedies of Randy and Michael.  We will never know.  Not knowing, however, is not our excuse for not knowing what we should do.  Reducing risk may prevent a tragedy.  And even if it doesn’t, knowing you did what you reasonably could may bring some small form of comfort.

How To Treat Water Using Solar Water Disinfection (SODIS) Method

Removing harmful pathogens from questionable water sources is a challenge for any outdoor enthusiast.  The most common methods are boiling, filtering, chemically treating, and exposing to UV light.  When most of us think of UV light, we think of an expensive battery powered device, such as a Steripen™.  The sun, however, is also a pretty good source of UV light, and given enough time to do its thing, can be just as effective as its artificial counterpart.

Solar Water Disinfection, or SODIS, is supported by the World Health Organization, UNICEF, and the Red Cross.  It has become more and more popular in developing nations as a cheap and effective water treatment solution.  The required ingredients for success are fairly simple and readily available:

  • A clear Polyethylene terephthalate (PET) bottle
  • Water
  • Sunlight
  • 6+ Hours

SODIS Water Purification MethodThere are of course a few minor important details.

  • Pet Recycle Code 1The bottle must be clear, unlabeled, unscratched and no larger than 2 Litters.  If the water is deeper than 10-12 inches, the UV light penetrate is decreased, and results less effective.
  • In the US, PET or PETE bottles are usually labeled with recycle code “1”.
  • The water being treated should be relatively clear.  Cloudy or turbid water should be filtered prior to treatment.
  • Bottles should be placed on their side, not upright, to ensure maximum exposure to sunlight.  Placing bottles on reflective surfaces have proven even more effective.
  • The sunlight should be relatively unobstructed.  If clouds cover more than half the sky, the exposure time will need to be increased, typically doubled.
  • This technique works well on common pathogens, which can cause life threatening diarrhea, but it is not effective against poisons or toxins.

Clearly this method was designed with developing nations in mind.

What about outdoor adventurers?

The question of SODIS for backpackers really comes down to practicality.  Although there certainly is plenty of sunlight in the wilderness, adventurers are often on the go, making 6 hours of undisturbed solar exposure a challenge.  Many are already struggling to figure out how to recharge their smartphones with clunky portable solar panels.  The thought of adding rows of water filled PET bottles in to the mix is perhaps just too much to ask.

Also, backpackers may not have the required easy to find in the front-country bottles.  Although some ultraliters, and some ultra-cheapskates, may carry reused ultra-thin Code-1 PET bottles (the Gatorade™ type), most of us have been trained to carry indestructible Code-7 BPA Free bottles (the Nalgene™ type).  Unfortunately Code-7 bottles do not allow the UV light from the sun to work its magic.

Is any of this relevant to backpackers?

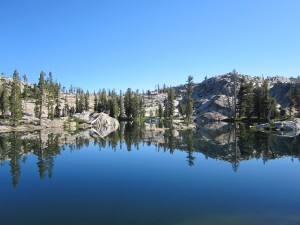
Take Water from Top of LakesPerhaps.  When most outdoors enthusiasts think about gathering water, we tend to favor fast moving streams.  The assumption is that the aeration and filtering will produce a purer, healthier water source.  Assumptions, however, are not always correct.  SODIS has proven that extended undisturbed exposure to UV light can disinfect pathogens.  Water in swift flowing streams is far from undisturbed exposure.  Lakes, however, are a different matter.  Is it possible that lake water, relatively still and exposed to repeated daily doses of UV light, is a better source of safe water?

According to Robert W. Derlet, MD, a Sierra Water researcher and author:

The UV rays from sunlight are powerful killers of microorganisms. For this reason, the first twelve inches of surface lake water have the fewest microorganisms. In nearly 300 samples of water from Sierra wilderness areas, our research group consistently found fewer total bacteria in lake surface water when compared to streams. In addition to sunlight, other factors may also reduce bacteria including settling effects, or ingestion of bacteria by zooplankton or other small organisms.

In other words, even if we do not carry PET bottles, and line them up for 6 hours of exposure, we can benefit from the cleansing SODIS-like method of UV light, if we are careful where we gather our water.  It turns out, the tops of lakes are better than the bottoms.

So as you sing your way towards the wilderness water, remember: 

Take it from the TOP!


NOTE:  The SODIS Initiative is part of the Swiss Federal Institute of Aquatic Sciences and Technology.  For more information, consult their website:

https://www.sodis.ch

How To Keep Wilderness Food Sanitary

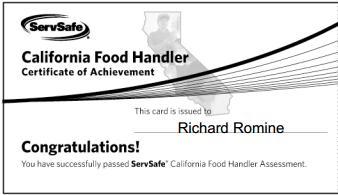
Food Handler Cert CardIn most of our United States anyone serving food to the public, including a wilderness guide preparing meals in the backcountry, should be Food Handler Certified.  The goal is preventing food borne illnesses.  The industry certification covers standard topics such as causes of food borne illness, factors that contribute to food related diseases, and basic food safety measures to decrease risk.  Like water born bacteria in the wilderness, food bacteria cannot be seen, smelled or tasted.  The appropriate approach is better safe than sorry.

The Partnership for Food Safety Education refers to their food safety strategy as the FightBAC!™ Guidelines.  Get it?  Fight back and fight “bac” – as in bacteria.  The four principles are:

  • Clean
  • Separate
  • Cook
  • Chill

Adventurers who have spent any time in the wilderness will immediately recognize the challenges to these four food safety tenets.

Clean –Wash Hands and Surfaces Often

Wildernesses contain a far greater abundance of dirt than of clean.  In fact, I am pretty sure my fingernails have never been packed with clean.  For environmental reasons, soap is discouraged in the wilderness.  Even so called bio-degradable camp soaps can have a negative impact.  It is possible to create a sanitizing solution with 1 teaspoon of bleach to 1 gallon of water, but wilderness disposal may be an issue.  So what’s an ethical packer to do?  Two effective sanitation techniques are ethyl alcohol (such as Purrell®) for hands, and boiling water for food surfaces (including pots, pans, and cutting utensils).  It may be possible to clean hands with boiling water, but it probably involves the extra resources of a first aid kit.  One thing you may have to get used to is the idea that clean and sterile are not the same thing.  It is possible to sterilize some pretty dirty surfaces, including you hands.

Separate – Don’t Cross-Contaminate

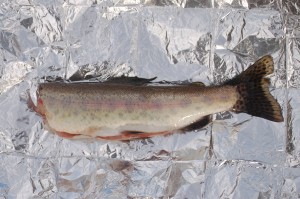
Raw FishThe push for separate but equal food is designed to prevent raw meat contaminates from migrating to other foods and surfaces. Cross contaminated foods such as produce, which are not cook, will significantly increase food illness risk.  Fortunately most backpackers do not bring raw meat on outings, and dehydrated foods are far less likely to cross-contaminate. Even so, you should clean surfaces and utensils when switching between the types of food being prepared.  If you catch fresh fish, it should be treated careful, and cooked and consumed quickly before bacteria can develop.

Cook – To Proper Safe Temperatures

When it comes to food bacteria, the smart approach is retardation.  In other words, we want to keep food in a state that retards bacterial growth.  Oxygen, temperature and moisture are key factors.  Dehydrating food retards growth, and allows us much more flexibility in wilderness storage temperature.  Once food is re-hydrated, however, we need other means to increase safety.  Two ways to keep food out of the danger zone are cooking and chilling.

Most meats are safe if cooked to an internal temperature of 145 F. degrees.  Ground meats and poultry should be cooked to 160-165 F. degrees.  For some backpacking food, the pre-trip cooking, dehydrating and storage are probably bigger risk factors than the wilderness “re-heat” temperatures.   However, better safe than sorry, so reheat foods to the appropriate and safe temperature.

Chill – Refrigerate Promptly

Unless you are snow camping, refrigeration is probably not an option.  This means foods which normally require refrigeration may not be appropriate for backpacking.  Some items, like air sealed hard cheeses for example, are probably safe for a few days.  Dehydrated foods are safer (and lighter to carry) than foods with moisture.

Leftovers, although useable at home, can be dangerous in the wilderness.  Once re-hydrated, many foods become unwanted growth opportunities.  Fortunately, most backpackers are hungry enough to consume the food they have carried.  This is especially true when reminded that if they do not finish it, depending on local regulations, they may have to bury it or carry it – neither of which is particularly fun.

Conclusion

Being in the wilderness makes sanitation challenging.  Being far from the civilized comforts or your own personal bathroom makes the consequence of poor sanitation even more challenging.  Do yourself and everyone else on the trip a favor – remember to clean, separate, cook and chill.  In fact, chilling in the wilderness is the primary reason I backpack.

For more information on food safety, check out:

https://www.foodsafety.gov/

How To Cache Water

Joshua Tree Desert
Joshua Tree National Park

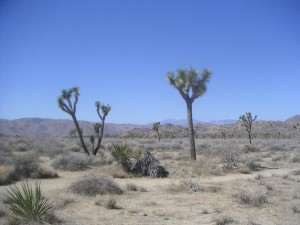
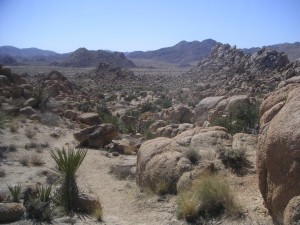
I recently helped guide a 50 mile trip through Joshua Tree National Park.  If you have not been to Joshua Tree, you may not know it as a national park made up of two distinct geographic terrains, both of which happen to be deserts – the Mojave and the Colorado.  Yes, there are some places in the world where one desert just isn’t dry enough, you have to have two!

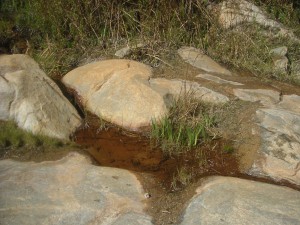
Because water is so sparse in these deserts, even if you can find it you can’t legally drink it.

Rare Desert Water
Rare Desert Water

It is strictly reserved for the local wildlife, who clearly knew enough to make advanced reservations.

So what’s a thirsty backpacker to do?

Carry On Luggage?

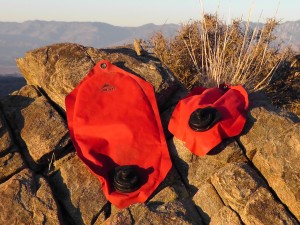
MSR Dromedary Bags
Dromedary Bags

One option for water is simply to carry it.  In a hot desert there are probably not many things you will be carrying more important than water.  Traveling in heat most backpackers require at least a gallon of water a day.  In the unlikely event that you don’t remember, a gallon of water weighs 8 pounds.  On this particular trip we came across a solo female backpacker who was carrying 4 gallons of water.  Yes, 4 x 8 = 32 pounds of water.  This was of course in addition to the rest of her gear, bringing to mind two words: stud and nutjob.

Our week long trip in the desert would therefore require 7 days x 8 pounds = 58 pounds of water per person.  A standard rule of thumb for pack weight is 25% to 30% of your body weight.  So if your body weighs 150 pounds, your pack (with water, food, tent, stoves, fuel, sleeping bag, etc) should weigh between 37 pounds and 45 pounds.  Unless you are carrying a lot of helium, I am not sure how you squeeze 58 pounds of water into that total weight range.

So again, what’s a thirsty backpacker to do?

Cache for Gold?

Water Cache Jug
Water Cache Jug

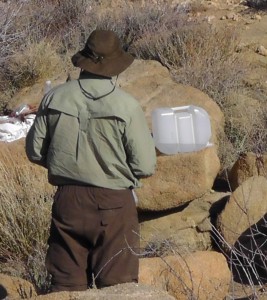
Although cache sounds like cash, it’s not about money.  It is, however, about a hidden treasure even more valuable, water.  By hiding water at strategic locations along your route you significantly decrease the amount you need to carry.

This perhaps raises some immediate questions I will attempt to anticipate and address.

If I can’t carry enough water during my trip, how can I carry enough to go hide it?

Good point.  Caching water does not usually mean hiking the exact same route carrying all the water you will need.  It usually involves multiple shorter trips, carrying only what you will need when you reach that particular location.   For our 50 mile hike we made a cache advance deposit of water in 3 different locations.  Between each location, we got back in our car and drove somewhere closer to the next cache site.  Although our total ultimate trip would be over a 50 mile route, the furthest we had to carry water jugs for caching was a couple of miles.

How do I know the water I hide will still be there when I need it?

Short answer: you don’t.  Long answer: you hide it well enough that no one else will ever find it.  As a practical matter most fellow backpackers who stumble upon your cache will respect your need and leave it alone.  If however, they feel an even greater need than yours they may be tempted to make a cache withdrawal.   It is possible you may find a thank you note or an apology note instead of your water.  I highly doubt it though.  No one writes notes anymore.

If I hide it really well, will I be able to find it?

Joshua Tree Rocks
Where did I put that water cache?

Good question. Maybe you won’t.  One point in your favor is that you will be highly motivated to find it.  Some techniques to help find it, in ascending order:

  • bring someone with a really good memory and sense of direction
  • take really good written notes, describing milestones and markers
  • take a digital picture of the location and surroundings
  • take a GPS waypoint of the cache (my preferred method)

As encouragement for your search, I offer this tale of truth.  On our Joshua Tree caching expedition the lead guide remembered caching water 3 years previous, which was never retrieved.  Given there is no time limit on leave-no-trace guilt, he was determined to find the stray plastic jug.  His search strategy was based on the following:

  • I think it might have been up this wash
  • No, wait, actually it might have been that one
  • I remember a tree, but I think it was bigger than this one

I am happy to say he did not take me up on any of my financial offers regarding the odds of a find.  To my total amazement he dipped behind a Joshua tree (which looked to me no different than the thousands of others available) and calmly said “found it.”  In case you are wondering what three years of UV light in the desert does to a plastic water bottle, let’s just say it did not improve it.  The water, clearly tired of waiting to be found, was long gone.  None the less we carried out in victory the remaining pieces, restoring the desert to its original pre-plastic state.

Are there rules for caching?

Cache Jug Tied to Pack
Pack Out Cache Jugs

Yes.  Each land manager has their own cache and carry rules, but they usually involve:

  • what, if anything, can be cached (water, food, gear)
  • how it must be marked (name, date, phone number)
  • how long it can be cached (how far in advance, total time)
  • pack it in, pack it out

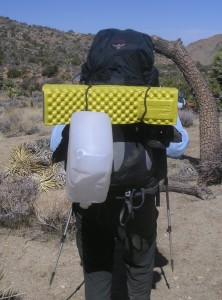
As you recover and use your cached water jugs, you will have to carry out the empties.  You can simply cut them up and hide them in your stash of trash.  Another option to consider, however, is to display them proudly on your pack, making your water caching cleverness clear for all to see… or at least to the two or three others backpackers you might stumble across in this wonderful waterless wasteland.

How To Avoid and Escape Avalanches

If you ever wondered what it’s like to be swept up in a snow avalanche, watch this 9 minute “point of view” video from Verbier Switzerland in Feb 2011.  The fact that it is only 9 minutes long is very good news.  It takes about a minute and a half for the skier to get swept up in the avalanche.  It is not until about five minutes later that his friends finally break through to him.  If this video were much longer the rescuer’s face at the end would surely be minus the smile.

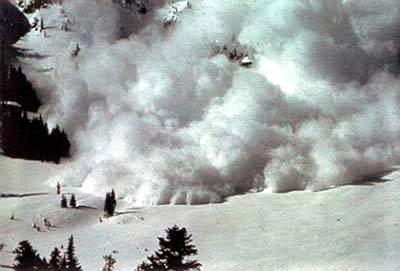
Avalanches are the ultimate in equal opportunity.  They don’t care if you are downhill skiing, cross-country skiing, snow shoeing, mountaineering, or snowmobiling. Given the right conditions they appear quite happy to crash your party.

Although they may appear as unpredictable as earthquakes, lightning strikes, and lottery tickets, there is a science to snow avalanches.  There are four things generally required for an avalanche:

  • A slab of snow
  • An unstable or weaker layer below
  • A steep slope (between 30-45 degrees)
  • A trigger event
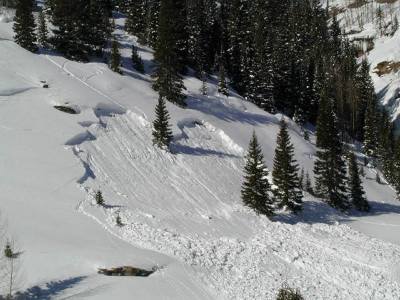
Lawine - WikiMedia Commons: Public Domain
Avalanche – Credit Lawine

Unfortunately, those 4 conditions are not that difficult to meet.  Therefore, anyone intentionally heading into avalanche country should, like a boyscout, “be prepared“.  In the simplest form, there are two main objectives.

  • Avalanche Avoidance
  • Rescue / Recovery

The obvious goal is to do avoidance so well that rescue is never required.  Proper planning, understanding risks, reading the warning signs and making the right decisions greatly increases your odds of having a smile at the end of your own outdoor snow movie. Because we are not born with these avalanche skills, acquiring them requires some form of training.

Avalanche Research and Education

There are several organizations dedicated to avalanche research and education. Two of the main ones in the US are:

Prior to their existence, there were no real standards for Avalanche training curriculum in the United States. AIARE has defined a multi-leveled training program, which many wilderness training organization deliver.

  • Avalanche Awareness (1-2 Hours)
  • Introduction to Avalanche Safety (1-2 Days)
  • Level I (3 Days) – Focused on Decision Making
  • Level II (4 Days) – Focused on Analyzing Snow Stability and Hazards
  • Level III (7 Days) – Focused on Advanced Professionals

As a quick starting point, you may consider this online awareness tutorial:

https://www.avalanche.org/tutorial/tutorial.html

Avalanche Equipment

In addition to skills, you also need to have and know how to use proper equipment.  This includes the things you would expect in other outdoor activities such as helmets, first aid kits, repair kits, food, water, etc.  But it also includes very avalanche rescue specific equipment such as:

  • beacons – electronic transmitters/receivers to help rescuers identify the above snow location of a buried victim
  • probes – extendable poles to pinpoint the victim’s location under the snow
  • shovels – tools to dig the victim out, with a goal of freeing an airway
Avalanche Wikimedia Commons: Schneebrett-PublicDomain
Avalanche Credit Schneebrett

Imagine you are living the scenario in the Verbier Avalanche video.  Research shows you have about 15 minutes to:

  • Realize you have lost a party member
  • Confirm the search area is safe
  • Switch your beacon transmitters to rescue mode
  • Perform a primary and secondary beacon search
  • Pinpoint victim location with a probe
  • Dig the victim out with shovel
  • Establish an airway
  • Administer first aid

All of this requires a great deal of training and practice.  Unfortunately, the survival rates can be depressingly low.   If swept up, you should do everything possible to stay on or near the surface.  Point your feet down hill, dig in, swim and fight to stay on the surface.  According to avalanche.org, if you get completely buried your chance of survival is only 30%.  It quickly becomes clear why avoidance is preferred to rescue.

Avalanche Warning Signs

The first signs to watch for to avoid an avalanche are the signs provided by professionals.   There are teams of professionals who regularly survey the snow and provide avalanche risk advisories and bulletins.  A great place to check is:

https://www.avalanche.org

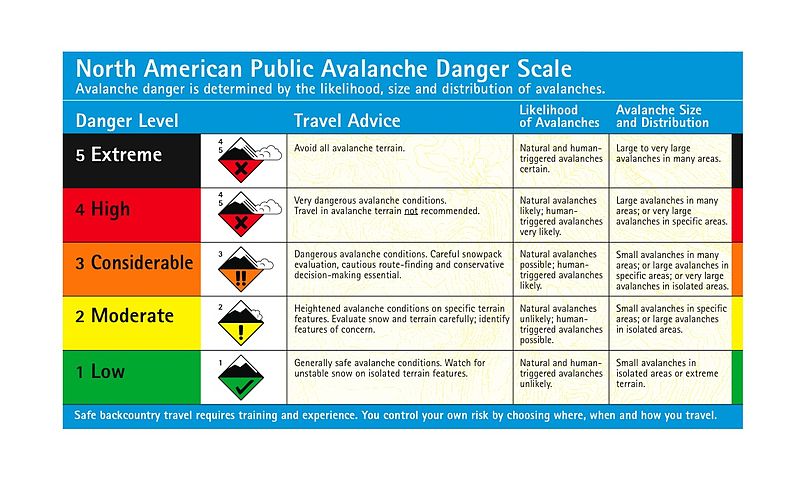
They provide links to various Avalanche Centers, including some in North America, Europe, New Zealand and Argentina.  In North America, the following warning system is used to indicate danger levels:

Avalanche Danger Scale
  • Extreme and High Danger areas should be avoided completely.
  • Considerable Danger areas require advanced training in snowpack evaluation, routes and decision making.
  • Moderate and Low Danger requires the ability to read warning signs and local conditions.

If after reading the bulletins you still decide to venture out, you should be watching for the classic danger signs.   These are often refereed to as the Red Flag Warnings:

  • Signs of Recent Avalanches – The most accurate indication of avalanche danger is sign of a recent avalanche.  The risk is clearly no longer theoretical.
  • Signs of Unstable Snow – Cracks, hollow sounds, and “whumping” are clear sign of instability.  “Whumping” is the sound made when a section of snow collapses onto itself.
  • Intense Precipitation – A significant build up of fresh snow or rain can create very unstable conditions.
  • Wind Blown Snow – Even if there has been no recent precipitation, snow moved by wind activity can load the leeward slopes, causing a similar instability.
  • Rapid Temperature Rise – quick temperature changes can cause snow to shift and slip, becoming less stable

Conclusion

Participating in snow sports can be a blast.  That blast may be the adrenaline rush that comes from skiing, snowboarding,  snowmobiling, or mountaineering in the great outdoors.  If, however,  you are not appropriately trained to read the warning signs and make good decisions, that blast may be from a freshly triggered avalanche.  This unintended rush of more than just adrenaline may bring new meaning to the term “ride of your life.”

How To Treat Circulatory Shock

Shocked Face - By Yakov Levi
Shocked Reaction: By Yakov Levi

The shocking thing about shock is that most of us have a fairly muddled understanding of it.  When we think of shock what often comes to mind is a sudden anxiety producing surprise – something that generates a reaction to fight, flight, or faint.  It might be the way you feel after:

  • a near miss traffic accident
  • seeing a loved one bleeding at an alarming rate
  • realizing your required final examination was yesterday, not today

Types of Shock

Psychological Shock

This type of shock may be psychological (of the mind) rather than physiological (of the body).  Because of this, it can also be seen by others as a weakness.  Not everyone goes into shock at the sight of blood.  Experiencing this type of shock may suggest your mind is just not tough enough to take it.  Chuck Norris would never experience psychological shock.

Stress and anxiety can produce very real shock-like symptoms such as elevated heart rate, rapid respiratory rate, and pale clammy skin.  The treatment for this shock is to calm the patient.  For example you may:

  • have them lie down
  • cover them with a blanket
  • gently elevate their feet
  • if appropriate, provide fluids

The cynical view is that you simply need to baby this baby.  Viewing shock as a mere mental weakness is dangerous, however, because there are in fact physiological causes of shock with very similar symptoms, which are indeed life threatening.

Circulatory Shock

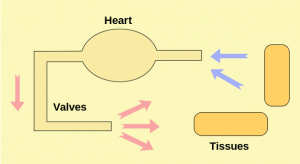
Circulatory System
Simplified Circulatory System

Circulatory shock, also sometimes referred to as medical shock, is caused by a lack of perfusion.  The root for perfusion is French and it means to “pour over.”  Perfusion simply means pushing blood under pressure to bathe our cells in oxygen.  In the wilderness a lack of bathing is usually a bad thing, but a lack of oxygen bathing the cells is a very bad thing.  This is not simply a weak state of mind, but a real threat to life.

Proper perfusion relies on a successful cardiovascular systems.  We need to keep oxygenated blood pumping through our body.  The proper medical terms may be confusing, but the the basic concepts are fairly clear:

  • Is there enough volume of blood in the body?
  • Is the pump (heart) working properly?
  • Are the pipes (vascular system) clear and properly sized?

Hypovolemic Shock

Hypovolemic shock means you do not have enough volume of blood for successful cell bathing.  This may be caused by things such as bleeding, dehydration, vomiting, diarrhea, and sever burns.  Quickly addressing the cause of the lack of blood volume is critical for treatment.

Cardiogenic Shock

Cardiogenic shock means the heart is not adequately pumping blood through the system.  This could be caused by a heart attack or a heart trauma.  Treating this root cause in the field may not be practical, so evacuation is key.

Distributive (or Vaseogenic) Shock

Distributive shock means the blood is not being distributed properly through the vascular system.  Proper blood pressure is key to distribution, and under normal operation your pipes can constrict or expand to adjust to the right pressure.   There are a variety of situations which can disrupt this system, such as nerve damage (neurogenic), infection (septic) or allergic reaction (anaphylatic).  Where possible, treating the cause is critical.  For example infections may need antibiotics and anaphylaxis may require antihistamines and epinephrine.

 The Shocking Reality

Regardless of the cause of shock (failure of volume, pump, or pipes) left untreated patients will slide down a predictable slippery slope.  Early treatment is critical to prevent this progression towards death.  The progression has three major states:

  • Compensatory Shock
  • Progressive (or Decompensatory) Shock
  • Refractory (or Irreversible) Shock

Compensatory Shock

Compensatory shock means there is something seriously wrong, but your body is managing to keep your blood pressure relatively normal by doing some pretty crazy things.  In other words, it is frantically “compensating.”   This compensation comes in the form of higher respiratory rates, higher heart rate, tighter vascular constriction – anything to keep oxygenated blood bathing those cells.

Progressive (or Decompensatory) Shock

In progressive or decompensatory shock, your body is beginning to lose the battle.  Your compensation efforts to keep blood pressure normal are failing.  Less oxygen is getting to the cells, including your brain, and aggressive treatment to turn things around is critical before it is too late.

Refractory (or Irreversible) Shock

Bummer.  The title pretty much gives this one away.  At some point the lack of oxygen causes your organs to die, including your brain.  Some refer to this stage as the “slow circling of the drain.”  It is  irreversible and death is inevitable.   On a brighter note, you won’t be alone in this journey, because by definition everyone will eventually get here.  It is essentially how we die.

General Shock Treatment

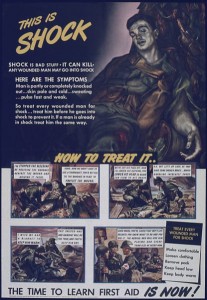
Shock Poster - Circa 1945
Shock Treatment – 1945

Shock treatment should not to be confused with shock therapy, which you may want after reading that last depressing paragraph. There are things that can be done to treat circulatory shock (or at least delay if for a significant number of years).  Much of the treatment for physiological shock is the same as for psychological, with one significant addition:

  • treat the cause
  • have them lie down
  • cover them with a blanket
  • gently elevate their feet
  • if appropriate, provide fluids

Patients who do not show vital sign improvements should be evacuated.

Conclusion

There are a wide variety of causes of circulatory shock, but they can all progress down a slippery slope towards death.  To be on the safe side, anytime someone appears in distress, you should probably assume shock and treat for it until proven otherwise.  Besides, who doesn’t enjoy a calming voice, a warm blanket, and chance to lie down with their feet up.

Disclaimer:  I am not a doctor, and do not pretend to be.  For more information, ask your doctor, and check medical online references, such as www.webmd.com.

How To become a certified Wilderness First Responder (WFR)

What is a WFR?

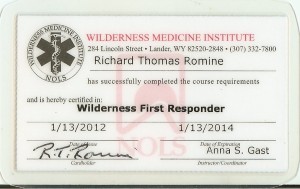
WMI Wilderness First Responder Certification Card
WMI Wilderness First Responder

A Wilderness First Responder, sometimes referred to as a “woofer,” is an individual trained and certified to provide extended emergency medical care in a wilderness setting.  In comparison think of an urban first responder as focused on providing care during the “golden hour” – that critical hour of support before definitive care arrives, usually in the form of an ambulance carrying equipment, EMTs and paramedics.  By definition a wilderness setting is more than an hour from care and depending on the remoteness of the setting and communication systems available, it may be days or weeks away.  The nature of the wilderness activity may also limit the equipment and resources available.  For example long distance backpackers, mountain climbers, and whitewater kayakers do not usually have readily available things like traction splints, backboards, spinal collars, blood pressure cuffs, or automated external defibrillators (AEDs).  A Wilderness First Responder has to be very creative and resourceful when providing extended care.

Who is a WFR?

Woofer’s are usually individuals who are in leadership positions for outdoor adventures such as backpacking, mountain climbing, river rafting, skiing, and similar remote activities.  They may be in roles such as trek leader, river guide, or ski patrol.  Many reputable outdoor organizations now require Wilderness First Responder certification for their outdoor employees.

Who certifies WFRs?

There is no one certification body for Wilderness First Responders.  A variety of medical and wilderness training organizations appear to have co-operated fairly well in creating training and testing standards.  A typical WFR certification requires 72-80 hours of classroom and practice training, as well as both a written and practical exam.  Although all certified individuals are called WFRs, the actual certification is controlled and tracked by the organization providing the training.  Most require re-certification within 2-3 years, and not all organizations recognize the others certification for re-certification, although the major players (such as NOLS/WMI, SOLO, and WMA) appear to play nice.

What content is covered?

Each training provider’s website offers a detailed course outline, but some common themes include:

  • Patient Assessment System
  • CPR
  • Head and Spine Injuries
  • Bone and Joint Injuries
  • Soft Tissue Injuries
  • Shock
  • Common Illnesses
  • Treatment Planning
  • Evacuation

Topics are covered with a combination of lecture and mock rescue practices, some of which are very elaborate and surprisingly realistic.

What is the difference between the organizations?

Because the schedule and location worked for me, I certified through NOLS/WMI.  They are the only organization with which I have first hand experience, but during my research I found very strong advocates for each of the major players and some of the smaller ones.  I suspect their curriculum and exams are similar.  One piece of advice I got early on was to focus on the quality of the instructor, as that would potentially have a greater impact on my experience.  Although I agree, I am not sure how practical that is to implement.  I lucked out and ended up with an excellent instructor.

I recommend you do your own research, but to help you out I offer these potential major providers and their own website positioning statements:

  • National Outdoor Leadership School – Wilderness Medicine Institute  https://www.nols.edu “The nationally recognized standard in wilderness medicine education”
  • Remote Medical International  https://www.remotemedical.com  “We are a medical and rescue services company specializing in remote areas.”
  • Stonehearth Open Learning Opportunities (SOLO)  https://www.soloschools.com/  “The oldest continuously operating school of wilderness medicine in the world.”
  • Wilderness Medical Associates https://www.wildmed.com  “The definitive wilderness course in medical leadership and critical thinking for outdoor, low-resource, and remote professionals and leaders.”

You should also consider quality smaller regional providers, although cross-organizational re-certification options may be more limited.  As an example, in the San Francisco Bay Area Foster Calm has an excellent reputation.  There are probably others in your area.

Conclusion

After experiencing through mock rescues and practice the wide variety of things that can go seriously wrong in the wilderness, I find myself wanting to add more and more things to my first aid kit.  The reality, of course, is that my pack has limited space, but my brain is still relatively empty.  The sign of a good “woofer,” I guess, is a continued focus on practice and skills rather than gear.  I think being a Wilderness First Responder is a life long journey, but one I am willing to undertake.  Besides my kids would probably say, a life long journey for me might not in fact be all that long.  I may now be a First Responder, but somehow the my kids always have the last response.

How To be a Good Samaritan

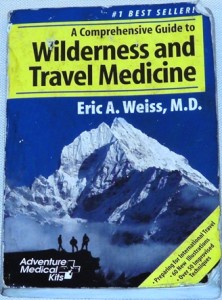
Wilderness and Travel Medicine Book
First Aid Book

In preparation to take a Wilderness First Responder certification course I started thinking about Samaritans, not that I know any personally.  When I looked them up in Wikipedia I was surprised to learn that as of Nov 2011 there were only 745 of them in the world, mostly near the cities of Nablus and Holon.  I am sure as with any group there are good and bad ones, but I am mostly interested in the good Samaritans-  the ones with the legal doctrine that is either going to encourage and protect me or set me up for complete and total financial ruin.

I started thinking about the golden rule:

Do unto other as you would have others do unto you

It sounded pretty good when I was thinking about others doing unto me things such as pulling me out from under an avalanche of snow, performing CPR to restart my pathetic little heart, or simply splinting my broken leg and carrying me out of the wilderness on a litter fit for a king.  It seemed a little less compelling when I thought about others doing unto me things such as dragging me by the leg compounding a spinal injury, CPR-ing my ribs into my spleen, or dropping me down the face of a cliff, making litter of my litter.

Why is it that intent and impact can have such different outcomes?

Clearly there are attorneys who can only survive by feasting on yummy rich tortes.  Fear of legal peril has put at risk our willingness to aid an injured fellow traveler.  The theory of the good Samaritan doctrine is to encourage voluntary assistance by offering some degree of immunity from legal damages.

Good Samaritan laws vary by country and state.   The trick is to craft Samaritan law in such a way to consider both intent and impact when a volunteer renders assistance.  If judged only by impact, any mistake would leave the volunteer at great peril, so much so, many would simply choose not to act.  By removing all risk, however, we might encourage the volunteer to engage in reckless and even wanton behavior. Balance is the key.  As an example:

Any person who in good faith renders emergency care, without remuneration or expectation of remuneration, at the scene of an accident or emergency to the victim of the accident or emergency shall not be liable for any civil damages resulting from the persons acts or omission, except for such damages as may result from the persons gross negligence or wanton acts or omissions.

This seems to capture the spirit, protected if reasonable, but not if grossly negligent or wanton.  But how does this type of language hold up in court.  Let’s consider an example from California:  Alexandra Van Horn v. Lisa Torti.  At the time California law stated:

no person who in good faith, and not for compensation, renders emergency care at the scene of an emergency shall be liable for any civil damages resulting from any act or omission.

On Nov 1st, 2004, Alexandra Van Horn was a passenger in a car that crashed head on into a light poll.  Lisa Torti, in a following car, pulled her then friend Alexandra Van Horn out of the car, fearing it would catch fire.  Alexandra claimed Lisa’s actions were reckless and compounded her injuries, which included paralysis.  The trial court ruled in Lisa’s favor, noting she was protected by the Good Samaritan law.  On appeal, however, Alexandra won on the grounds that the law only applied to medical aid, and Lisa’s aid was non-medical and therefore not protected.  The California Supreme court heard the case in March 2008 and in a divided 4-3 decision sided with Alexandra, meaning no protection for apparently Bad Samaritan Lisa.

The potential repercussions for Samaritans good and bad was staggering.  The California legislation, not exactly known for speed of purpose, immediately introduced and passed bills reversing the Supreme Courts ruling.  In the process, they also added language regarding gross negligence and wanton misconduct.  One hopes that future courts will rule as the legislators intended, but given Lisa’s earlier experience, one has to wonder.

The decision to render aid or not is personal.  For my sake, I hope you are trained and decide to help me.  For your sake, I am enrolled in the training, and hope never to have to use it.

Legal Notice: I am not an attorney and have never even played one on television.  For advice on Samaritan laws specific to your situation and region, consult your own attorney, mileage may vary, batteries not included, and objects in mirror may actually be closer than they appear.